Ververica Platform Multitenancy: deployment isolation on OpenShift
Organizational decisions to adopt Apache Flink by our customers are oftentimes taken on a global level, designed to allow independent teams to start working with streaming technology without the need to support separate installations in each individual project. This scenario often results in initiatives to implement a centralized, multitenant, self-service stream processing platform . Such installations allow delegating the tasks of deployment automation and infrastructure maintenance to units that specialize in this type of issues, while other teams can focus on the implementation of specific business solutions.
One of the key aspects of building self-service systems is the isolation of resources and data between individual teams. By resource isolation we mean the ability to introduce and enforce computational resource quotas, and by data isolation, we mean ensuring that one team does not have access to credentials or other sensitive data of the other.
In this blog post, we demonstrate a foundational step towards implementing such a solution: separation of the Ververica Platform installation from the Namespaces where Flink Jobs will be deployed. Further instructions will be provided for the platform deployment on OpenShift, one of the most widespread Kubernetes distributions in the enterprise context.
![[2020-07]-VVP+OpeShift](https://www.ververica.com/hs-fs/hubfs/%5B2020-07%5D-VVP+OpeShift.png?width=600&name=%5B2020-07%5D-VVP+OpeShift.png)
Both the data isolation and resource isolation aspects mentioned above are already addressed at the level of Kubernetes technology. In order to take advantage of these existing solutions, we need to bring together three main concepts:
-
OpenShift Projects (corresponding to Kubernetes Namespaces)
-
Ververica Platform Namespaces (referred to as vNamespaces in the remainder of the post)
-
Ververica Platform Deployment Targets (simply Deployment Targets in this post)
Separate OpenShift Projects enable the desired isolation of resources and data. Separate vNamespaces, in their turn, make it possible to restrict cross-team access to details as well as control over Flink Jobs inside a shared Ververica Platform installation. Deployment Targets provide the binding between Kubernetes and Ververica Platform-managed resources and tie together infrastructure and user permissions restrictions.
Requirements
The following description will be provided based on a local installation of OpenShift using minishift. Please use the minishift installation instructions and the OpenShift CLI client installation instructions to continue with the tutorial in case you do not have an actual OpenShift cluster running. This tutorial assumes usage of Helm 2 (Helm 3 has some changes compared to the Helm 2 command structure).
Environment:
$ minishift version
minishift v1.34.1+c2ff9cb

$ minishift openshift version
openshift v3.11.0+bd0bee4-337

$ oc version
Client Version: version.Info{Major:"4", Minor:"1+", GitVersion:"v4.1.0+b4261e0", GitCommit:"b4261e07ed", GitTreeState:"clean", BuildDate:"2019-07-06T03:16:01Z", GoVersion:"go1.12.6", Compiler:"gc", Platform:"darwin/amd64"}
Server Version: version.Info{Major:"1", Minor:"11+", GitVersion:"v1.11.0+d4cacc0", GitCommit:"d4cacc0", GitTreeState:"clean", BuildDate:"2019-11-12T22:11:04Z", GoVersion:"go1.10.8", Compiler:"gc", Platform:"linux/amd64"}
Instructions:
1. Start minishift VM with enough resources:
$ minishift start --cpus=4 --memory=8GB
If you have previously ran minishift with fewer allocated resources (default), you will also need to recreate the VM
$ minishift delete
$ minishift start --cpus=4 --memory=8GB
2. Create three OpenShift projects - one for the platform, and the other two for isolating team-1 and team-2 environments:
$ oc login --username=developer --password=irrelevant
$ oc new-project vvp
$ oc new-project vvp-jobs-team-1
$ oc new-project vvp-jobs-team-2
3. Prepare the Ververica Platform installation. Download ververica-platform-2.0.4.tgz from the customer portal or use the trial license: https://www.ververica.com/download.
$ mkdir vvp-resources
$ vim values-multit.yaml //create new file
$ cat values-multit.yaml
#Empty security context - let OpenShift handle fsGroups and UIDs for host volume mounts
securityContext:
rbac:
  additionalNamespaces:
    - vvp-jobs-team-1
    - vvp-jobs-team-2
$ helm template ververica-platform-2.0.4.tgz --values values-multit.yaml --name vvp --namespace vvp --output-dir vvp-resources
4. Install Ververica Platform:
$ oc project vvp
$ oc apply --recursive --filename vvp-resources
5. Expose the service:
$ oc expose service/vvp-ververica-platform
$ export VVP_IP=$(oc get routes --no-headers=true | tr -s ' ' | cut -d' ' -f2)
$ echo $VVP_IP
vvp-ververica-platform-vvp.192.168.64.5.nip.io   // (example) Open in browser
6. Verify that the class="valid active">installation is complete (pulling the images can take some time, depending on your internet connection):
$ oc get pods // Wait until 3/3 Running state
NAME                                      READY   STATUS    RESTARTS   AGE
vvp-ververica-platform-7bd7857667-mkprd   3/3     Running   0          1h
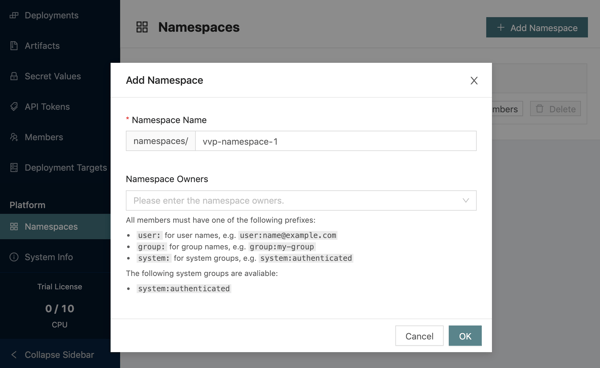
7. class="valid active">Create separate vNamespaces in the UI. In the class="valid active">Platform class="valid active"> section of the menu click class="valid active">Namespaces → Add Namespace. class="valid active">Enter class="valid active">vvp-namespace-1 class="valid active"> as the class="valid active">Namespace Name, class="valid active">click OK.
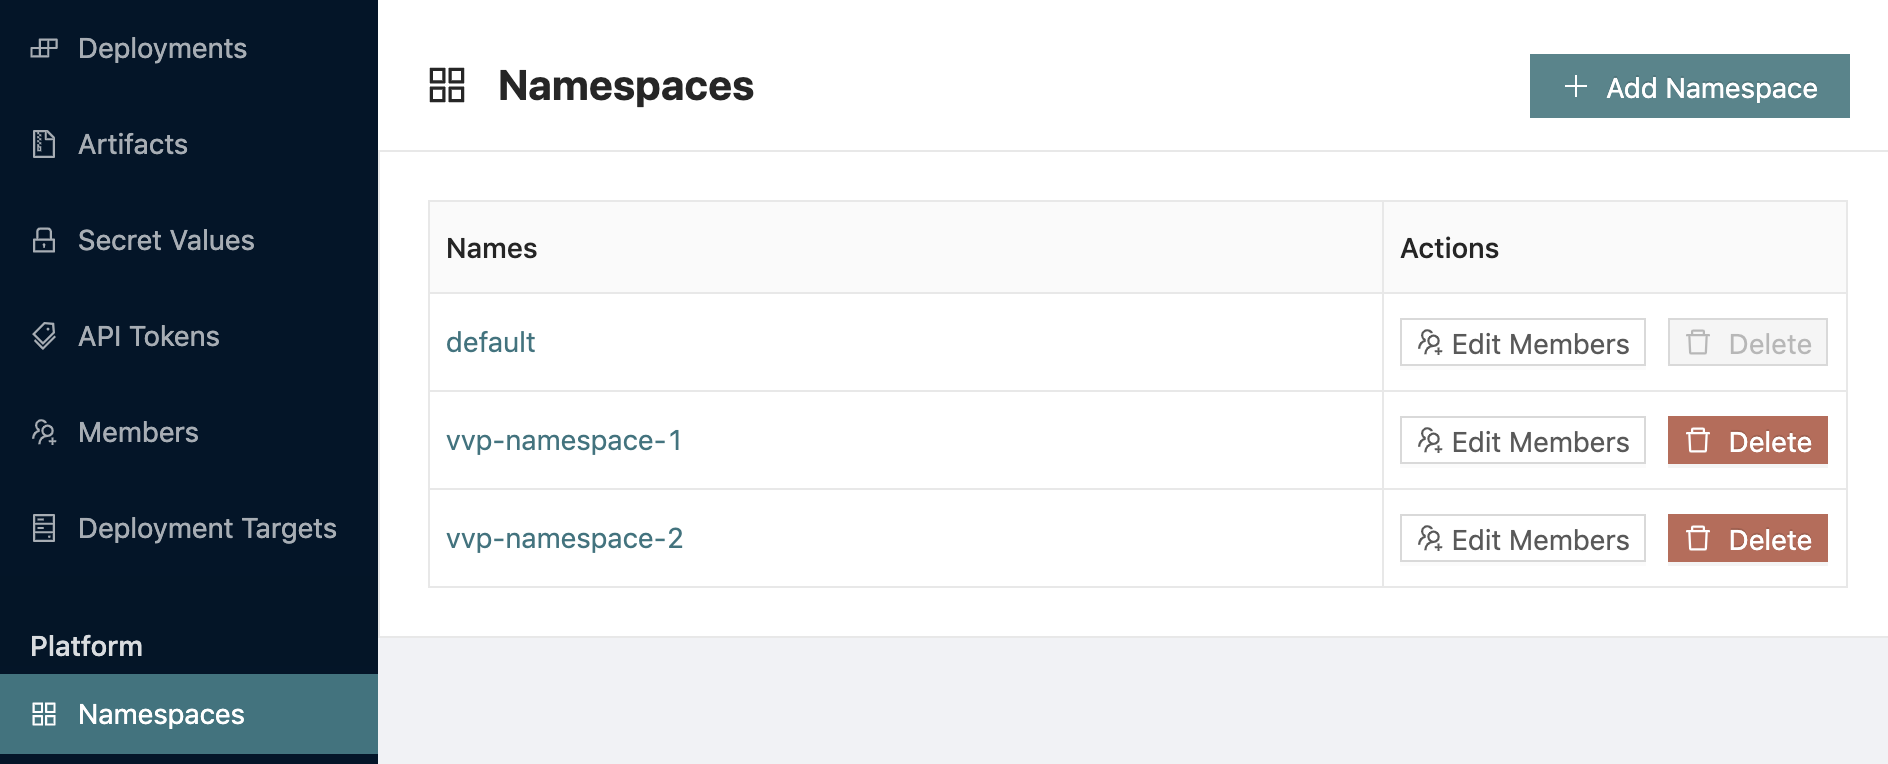
Repeat the same for the vvp-namespace-2:
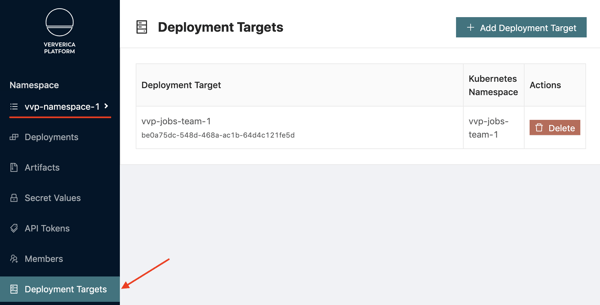
8. Create new Deployment Targets , corresponding to the vvp-jobs-team-1 and vvp-jobs-team-2 OpenShift Project/Kubernetes Namespaces in the UI. Use the Namespace selector to switch to the vvp-namespace-1 and select Deployment Targets → Add Deployment Target. Enter vvp-jobs-team-1 into both Deployment Target Name and Kubernetes Namespace fields. Repeat the same process inside vvp-namespace-2 for the vvp-jobs-team-2 Deployment Target respectively.
Alternatively, use the REST API:
$ vim vvp-jobs-team-1-deployment-target.yaml
$ cat vvp-jobs-team-1-deployment-target.yaml
kind: DeploymentTarget
apiVersion: v1
metadata:
  name: vvp-jobs-team-1
  namespace: default
  resourceVersion: 1
spec:
  kubernetes:
    namespace: vvp-jobs-team-1

$ curl -X POST -H "Content-Type: application/yaml"  http://${VVP_IP}/api/v1/namespaces/default/deployment-targets --data-binary @vvp-jobs-team-1-deployment-target.yaml
 //Please note that some versions of cURL do not handle files uploads in a consistent manner. Also depending on the shell you are using, some quotations marks might be needed for variables substitutions.
Repeat the same for vvp-jobs-team-2.
9. Switch to the vvp-namespace-1 vNamespace, go to Deployments → Create Deployment
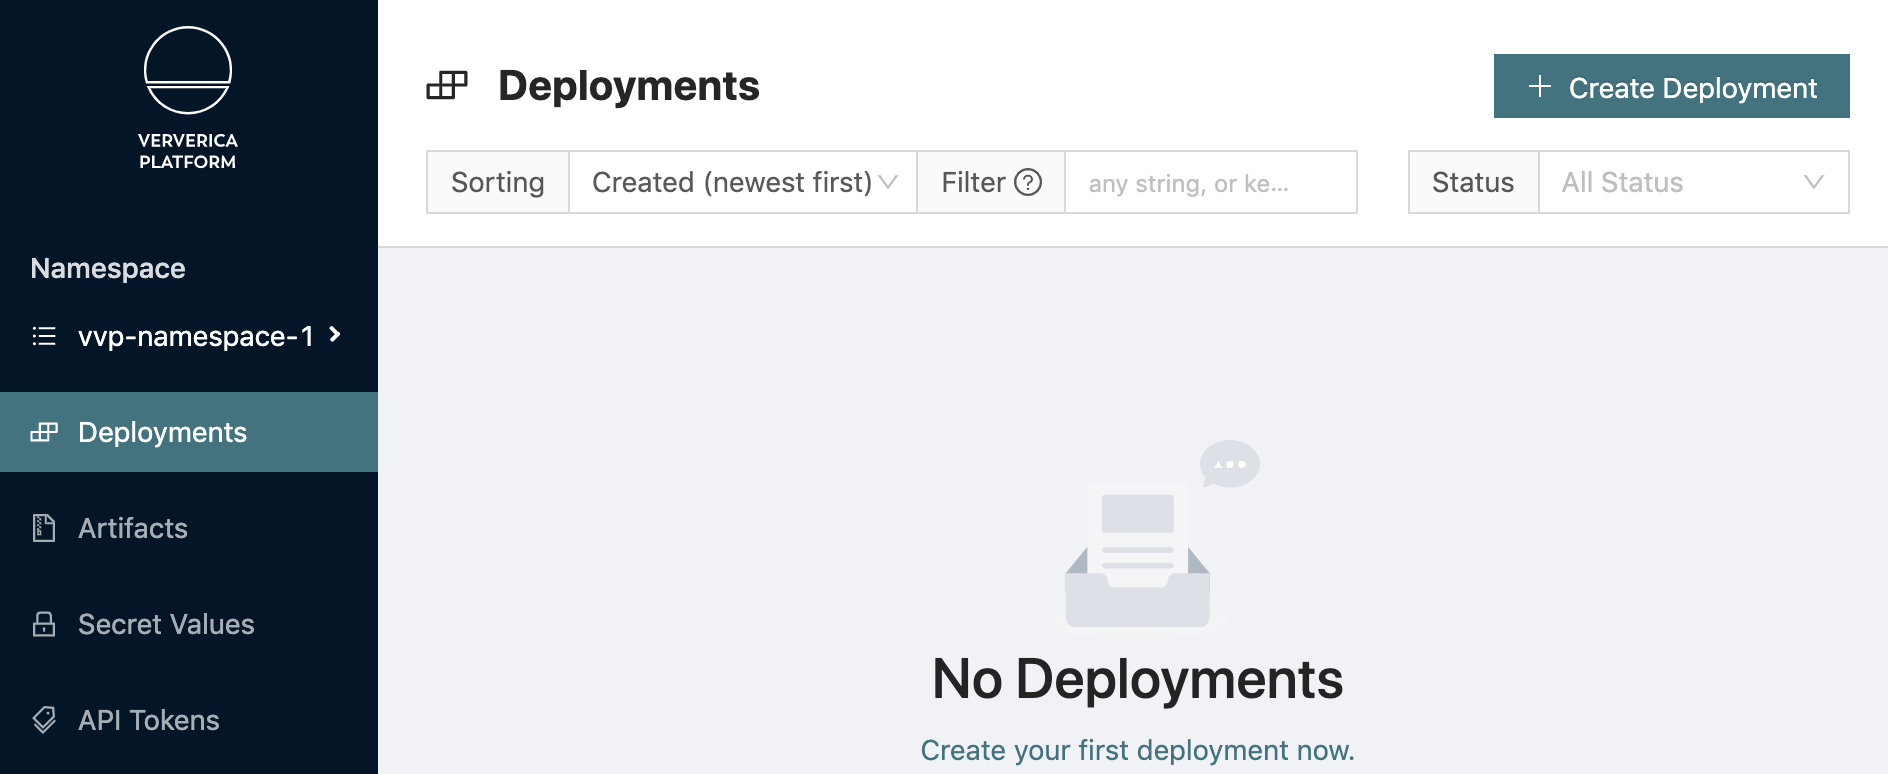
Create a new Deployment in the vvp-namespace-1 with vvp-jobs-team-1 as the Deployment Target (OpenShift Project/Kubernetes Namespace) with the following values:
Name: TopSpeedWindowing

Deployment Target:  vvp-jobs-team-1

Jar URI:
https://repo1.maven.org/maven2/org/apache/flink/flink-examples-streaming_2.12/1.9.1/flink-examples-streaming_2.12-1.9.1-TopSpeedWindowing.jar

Flink Version: '1.9'

Flink Image Tag: 1.9.1-stream1-scala_2.12

Parallelism: 1

CPU JobManager: 0.5

Memory JobManager:  1G

CPU TaskManager: 0.5

Memory TaskManager:  1G
Apply Changes -> Start the deployment.
The deployment status should soon transition to "Running" state:

Alternative with cURL:
$ vim deployment-example.yaml
$ cat deployment-example.yaml
kind: Deployment
apiVersion: v1
metadata:
  name: TopSpeedWindowing
  namespace: vvp-namespace-1
spec:
  state: RUNNING
  upgradeStrategy:
    kind: STATELESS
  restoreStrategy:
    kind: LATEST_SAVEPOINT
  deploymentTargetId: %%ID_OF_VVP_JOBS_DEPLOYMENT_TARGET%%
  template:
    spec:
      artifact:
        kind: JAR
        jarUri: >-
          https://repo1.maven.org/maven2/org/apache/flink/flink-examples-streaming_2.12/1.9.1/flink-examples-streaming_2.12-1.9.1-TopSpeedWindowing.jar
        flinkVersion: '1.9'
        flinkImageRegistry: registry.platform.data-artisans.net/v2.0
        flinkImageRepository: flink
        flinkImageTag: 1.9.1-stream1-scala_2.12
      parallelism: 1
      resources:
        jobmanager:
          cpu: 0.5
          memory: 1G
        taskmanager:
          cpu: 0.5
          memory: 1G
Substitute %%ID_OF_VVP_JOBS_DEPLOYMENT_TARGET%% with the ID of the previously created vvp-jobs-team-1 Deployment Target.
$ curl -X POST -H 'Content-Type: application/yaml' http://$VVP_IP/api/v1/namespaces/vvp-namespace-1/deployments --data-binary @deployment-example.yaml
10. Next, you can verify that the test deployment is running within vvp-jobs-team-1 namespace/OpenShift project:
$ oc project vvp-jobs-team-1
 $ oc get pods
NAME                                                              READY   STATUS    RESTARTS   AGE
job-1af87aeb-2b8c-4d6e-bc4b-45f95d5a4faf-jobmanager-nphl8         1/1     Running   0          11m
job-1af87aeb-2b8c-4d6e-bc4b-45f95d5a4faf-taskmanager-559bfr9k22   1/1     Running   0          11m
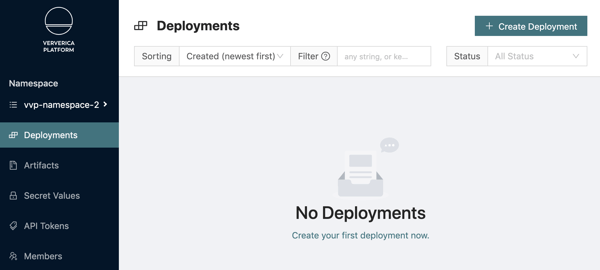
11. When you switch to vvp-namespace-2, you will see that the previously created deployment is not visible (it belongs to vvp-namespace-1):
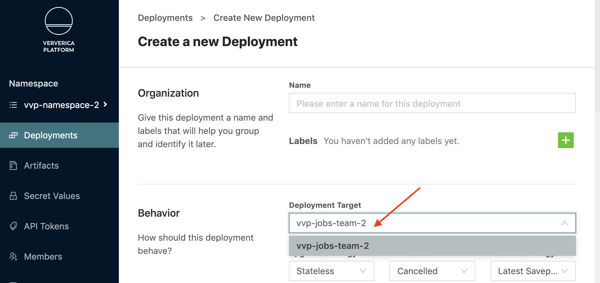
You will also observe that users that have access to vvp-namespace-2 are only able to create deployments in the vvp-jobs-team-2 Namespace/Deployment Target:
By performing the separation of resources described above, we can use the Ververica Platform access control mechanism to assign users to required vNamespaces and limit their ability to create new Deployment Targets, thus securing the association between OpenShift Projects and Ververica Namespaces and achieving the desired resources and data isolation requirements.
Conclusion
Building and operating self-service stream processing platforms with isolation of resources and data between individual teams enables the modern enterprise to deliver true value from stream processing and real time data to both internal and external stakeholders.
In this post we covered how Ververica Platform achieves such isolation and we showcased how you can deploy the Platform on OpenShift. For further information, we encourage you to visit the Ververica Platform documentation or contact us with any questions.
You may also like

Data Sovereignty Is Existential Most Platforms Treat It Like a Feature
DORA and NIS2 demand provable data sovereignty. Most streaming platforms ...

Dual Pipelines Are Done. Ververica Unifies Batch and Streaming.
Ververica unifies batch and streaming data execution, eliminating pipelin...

A World Without Kafka
Discover why Apache Kafka is becoming outdated for real-time analytics an...

Introducing The Era of "Zero-State" Streaming Joins
Introducing the next evolution in streaming joins: Apache Fluss offers ze...


